

Non-Toxic Spring Cleaning Solutions
Spring is a time when we clean our homes in depth. We get a great feeling when the clutter and cobwebs are gone. However, many cleaning products are full of chemicals which are often both unnecessary and toxic. If you are looking for a healthy way to get your home in good shape without using chemical-laden cleaning products, here are some tips to get you there.

Vinegar
Vinegar is by far one of the most popular non-toxic cleaners. Ask anyone who avoids chemicals what their stand-bys are, and they will certainly mention vinegar. Vinegar is an acidic substance, and because of this, it effectively combats everything from grease to other build-ups of all kinds. Use vinegar on a clean rag to make mirrors squeaky clean, and to give a nice shine to sinks and toilet bowls. For floors that shine, mix vinegar with water and a few drops of soap, and wipe with a rag.
Lemon Juice
Like vinegar, lemon juice works because of its acidity. Clean your cutting boards by slicing a lemon in half and rubbing it into the board, as this removes both stains and germs. If your glass shower doors appear scum-laden, wipe a lemon over them to remove the build-up.
When was the last time you washed your microwave? This is a spring cleaning essential. Put a few tablespoons of lemon juice into a glass of water, and microwave to the boiling point. Keep the door closed for another 10 minutes and wipe clean with a cloth once it is opened. You will find that the food particles wipe away easily.
Baking Soda
Baking soda is another cleaning substance which has no limits. It kills viruses, and has deodorizing and grease-cutting capabilities. If you want to get rid of bathtub scum, sprinkle baking soda on a damp cloth, wipe it over the grayish scum, and wipe it away easily.
Tea Tree Essential Oil
There are many essential oils that are great to put into your box of cleaning supplies. One of the most popular essential oils used for cleaning is tea tree oil. This oil is antiviral, antibacterial, antimicrobial, and antifungal. It is extremely strong when undiluted, so simply put a few drops into any cleaning solution such as vinegar and water in order to give it an extra boost.
Olive Oil
Olive oil is a great cleaner, and perfect for polishing as well. Olive oil lifts dirt, so it is perfect to use as wood cleaner. It will also give it a nice shine while you clean. If you want it to have an extra pleasant scent, simply add a few drops of orange or lemon oil, and some vinegar if you like. Put this all in a spray bottle, or else dip a rag into the solution before wiping the wooden table or floors.
Spring cleaning is a perfect time to make your home feel like new. It doesn’t take dangerous and toxic chemicals to do so. Simply use some of these tried and tested natural cleaning supplies and your home will be feeling fresh in no time.
You can also check out my recipe for non-toxic disinfectant spray.

7 Reasons to Spring Clean Your Home
It's about that time of year when you're starting to think about spring cleaning your home.
Maybe you're dreading taking the time to dive in and get the work done, so I thought I'd give you some things to think on as to why it's a good idea to go ahead and spring clean your home.
Here are seven reasons to spring clean your home:

1. Improves your mood
Having a clean home is a great feeling. A cluttered, messy environment can wreak havoc on one’s emotions. Being able to come home every day to a space that is tidy and organized is a great gift you can give to yourself.
2. Relieves stress
It is a depressing feeling to wake up to disorder every single morning. Many people can attest to the fact that living in an untidy environment brings you a great amount of unnecessary stress. Spring cleaning will ensure that your home feels peaceful, rather than the chaos that you may have been forced to become used to.
3. Makes it easier to practice hospitality
No one wants to invite their friends over to a home that appears uncared for, and it is embarrassing to your family to have a dirty house. When your home has been through a detailed spring cleaning, you won't have a second thought about inviting others. It will be a pleasure for you, your family, and your guests.
4. Saves time
When you have to dig through a pile of clothing to find a small piece you have misplaced, or search yet again for the keys or shoes you lose on a consistent basis, valuable time is being lost. Spring cleaning saves time, as it give you a change to reorganize. It allows you to sort through everything you own once again, and give each tiny item a place of its own in order to be easily found each and every time.
5. Helps you be more organized
When you are organized, life runs more smoothly. If your home is orderly, both you and your guests will feel the difference. It will be easier to go about your daily duties, and keep on top of everything you are responsible for.
6. Gives you a workout
Spring cleaning is a great workout. It may be surprising to some, but both light and heavy housework give your body a boost. You may be surprised at what a sweat you work up while getting your home into tip-top shape. You can be sure to move your muscles, stimulate your lymphatic system, and even get a bit of cardio in while organizing items and scrubbing walls. If you don't normally have time to exercise, spring cleaning your home provides a great opportunity to get in a workout.
7. Blesses others
One of spring cleaning’s outcomes is finding things that we realize we do not need. This is a great time to give away what we cannot use anymore to someone who can benefit from our unwanted items. When you have sorted through clothing that no longer fits, appliances you no longer use, and books that your children have outgrown, you have a choice what you will do with it all. Consider donating to a charity or someone in need.
There are many benefits of spring cleaning, and these are just a few. Keep yourself going through the hard work with the thoughts of everything you will gain.
Note: I realize not everyone has the time or physical energy to spring clean their entire home all in one big sweep. If that is the case, consider spring cleaning year-round! Choose one area of your home to focus on each week. Declutter, organize, and deep clean one small area on a consistent basis, and you will find that you can keep your entire home in “spring cleaned” condition without having to devote an unreasonable amount of time or energy once a year.

Taming the Chaos of the Spring Cleaning Routine
Guest post by Michelle from Blooming With Joy.

It’s time to clear the clutter and begin spring cleaning!
Although it's work, I love the feeling of a freshly spring cleaned home. My problem isn’t finding motivation for spring cleaning because I enjoy getting everything back in place. My issue is keeping things in order after my spring cleaning list is completed.
See, I have this feast or famine mentality. I clean like mad woman to check off all my boxes every day. As soon as the ink has dried on the check-list, it’s time to the start cleaning all over. Inevitably, I will skip a beat, fall out of sync, and completely give up for a week at a time, or longer. This ongoing cycle implies I, personally, am a failure. If you’re like me, sometime failure lurks like a dark cloud overhead. Let go of the guilt! Cleaning is what we do; it does not define us a person!
How to Tame the Chaos
My definition of clean was nothing less than perfect, spotless, everything in its place. I have learned that I live in my home. Striving for a model home with kids will only lead to frustration. To tame the chaos I needed to redefine the meaning of clean and change my philosophy towards cleaning. My new mentality eased my need for perfection and turned my focus to keeping the clutter moving and laundry fluffed.

Less is more: Figure out what you can realistically accomplish in a day, and then work on those chores. It is not possible to do it all. Your kids should be helping with chores of their own too!
Spring Cleaning Routine: Instead of deep cleaning once a year, do it more frequently to catch extra messes. Set aside time during a break week or take off a special day for a deeper cleaning.
Here is an example of how to tame the chaos:
- I would like the playroom organized. On a daily basis I just want to see the floor. Actually, I finally gave up and tossed the idea of having a playroom in our home. Each child keeps their toys in their room and they are then responsible for their room.
- I would like a spotless kitchen. Instead I focus on running the dishwasher and wiping the counter.
- I would like to do the laundry on a daily basis. I have found that doing it weekly often works better.
Doing a little cleaning every day does not result in a perfect home, but it keeps me happier and our home healthier.
Motivating Kids after Spring Cleaning
After I learned to tame the chaos, my challenge was finding a good chore routine for after spring cleaning. So I researched chore charts but none fit the flexibility of my life. I might schedule to clean the bathrooms on Wednesday but reality says it might be Friday before I get them cleaned. This was frustrating. So I came up with a Chore Card System that works really well and offers the flexibility I need as a homeschooling mom! My new eBook Motivate Kids to Clean: Chore Card System has a fully customizable chore cards and point system, inspiration for Mom, how to make a simple schedule, and more.

Motivate Kids to Clean: Chore Card System {Reg. $4.99} will be offered as a special deal to Imperfect Homemaker readers for 20% off.
The special button below will automatically give you the 20% off price:
![]()
Encouragement for Mom
Do you struggle with check-list guilt or waver between perfection and chaos? Do you struggle with the temptation to replay the events over and over in your mind as self-punishment arises? My friend, God doesn’t love you anymore when you are perfect nor does he love you any less after you’ve blown it!
God’s very nature is Love.
He loved us before we became super mom and He loves us after we realize we are not. A woman’s superpower persona has existed for all of time. You are not alone in feeling tempted to avoid God when it seems your accomplishments lacking. Look what Jesus says to Super Hero Martha:
“Martha, Martha, thou art careful and troubled about many things: But one thing is needful: and Mary hath chosen that good part, which shall not be taken away from her.” (Luke 10:41-42)
Good things can be a distraction from greater things. There are things we need to tend to. However, we cannot discern our priorities clearly until we have been filled up by God’s word.
To truly tame the chaos of spring cleaning, make your quiet time daily priority number one.
I pray you begin Blooming With Joy through every chaotic moment, disappointment, and mess!
Michelle Pohl
Organize Your Fridge and Reduce Food Waste
Did you know that it's possible to organize your fridge and keep it that way?
For the longest time, I tried to organize my fridge and keep it cleaned, but it seemed like things were always getting shoved to the back and would end up rotten by the time I found them.
I finally had one of those “duh” moments when I realized that organizing my fridge and minimizing food waste didn't have to be difficult at all.
All it took was a few labels.
Sure, I could have just designated certain shelves for certain foods, but whenever I tried that, I would always forget (or my family didn't know what went where) and things would end up in disarray again.
In less than 15 minutes time, I came up with the world's easiest system for organizing my fridge. Yours will probably end up looking different than mine due to the different setup of different refrigerators, but you'll get the idea of how you can create an easy-to-use system for keeping your refrigerator organized.

First, I took everything out and washed the shelves thoroughly. I also threw away anything that had gone bad or that I knew I wasn't going to use. Then I set it up like this:
Top Shelf:
Beverages. That's it. Since I often buy 8 gallons of raw milk at one time, I need that shelf completely dedicated to beverages.
Drawer:
Cheese and lunch meat. (Side note: lunch meat is not something I recommend consuming regularly. We have it when we're really feeling the need for something quick and easy, but we make sure to buy a kind that is nitrate/nitrite free.)
Middle Shelf:
On the left side I put ingredients such as cooked meat, broth, chopped onions, or anything else that is pre-prepared that will be a component of a meal. I labeled that side simply “Ingredients”. The right side is labeled “Leftovers”, so I'm sure you can figure out what goes there. I try to make sure to put the most recent leftovers in the back and move the older ones to the front. It's a lot easier to make sure we eat the older stuff before it goes bad when it's looking me right in the face when I open the fridge.
Bottom Shelf:
The left side is labeled “Snacks” and holds things like granola bars, applesauce, and anything else that is meant to be grab-n-go. Since snacks are such a frequented category of food in our household, having them all in one designated spot keeps people from digging through the fridge in search of something to eat, and eliminates the disorganization that follows. Since there will inevitably be something that doesn't fall into any category, the bottom right shelf is labeled “Miscellaneous”. That way I have a place to put everything even if I'm not sure where it should go.
Produce Drawers:
I have labeled the produce drawers with “Week 1” and “Week 2”. If not everything gets used up on the first week, it gets moved over to the “Week 2” drawer before I bring put any new groceries away. When I'm deciding what vegetables to have with dinner, I always check the “Week 2” drawer and use up whatever's in there first.
In the door I keep condiments, supplements that require refrigeration, butter, and anything else small. I try to group like items together and eliminate as many unnecessary items as possible. For example, instead of having 10 different kinds of salad dressing in there cluttering things up, I make our salad dressing from scratch. I usually only make enough for one meal so that I can make whichever kind we prefer and not end up with a bunch of things in there that end up going bad.
I've never considered myself an organized person, but ever since I labeled the shelves and started putting things in specific places, our food waste has been drastically reduced. It's also easier to decide what to have for dinner because I can easily see what needs to be cooked up first.
And the best part is that it only took a few minutes to organize, and it has stayed that way for a long time!
I hope my system will give you an idea of how to organize your own fridge and reduce food waste!

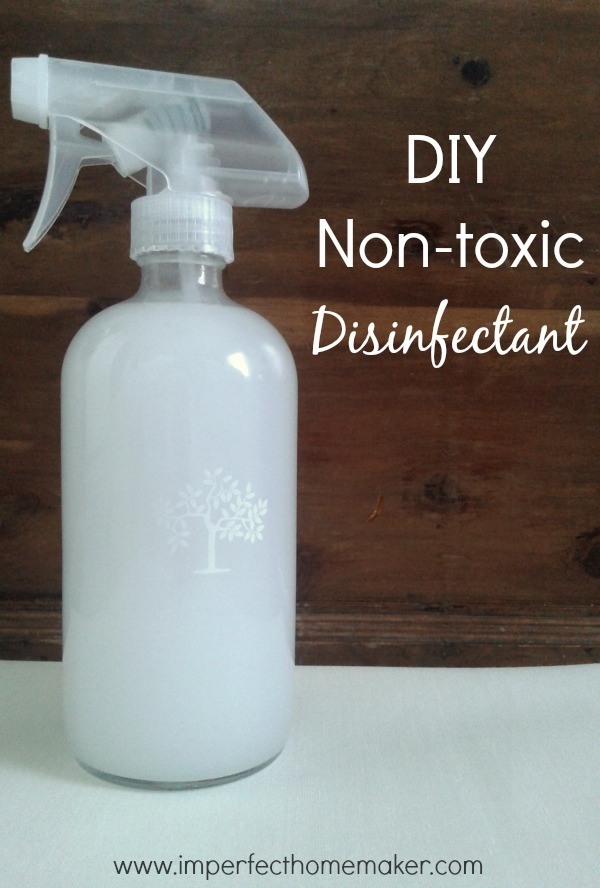
Make Homemade Non-Toxic Disinfectant in 60 Seconds
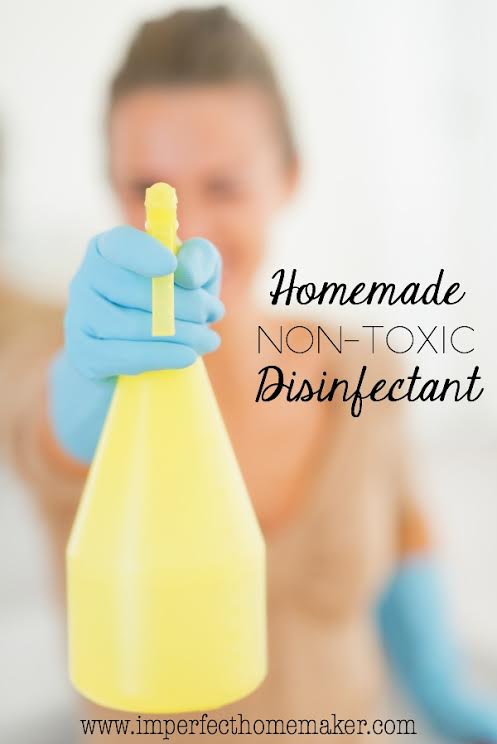
I had several people ask about my Non-toxic disinfectant recipe, so here it is:
16 oz. water
3 tbsp. liquid castile soap
30 drops tea tree oil
Mix together in a spray bottle.
Isn't that easy? You can throw it together in about 60 seconds and use it for pretty much anything!
Below are some other ways you can make a non-toxic disinfectant if you don’t have these ingredients on hand.
Other non-toxic products with disinfecting properties:
- Vinegar water (50/50 ratio) (do not use on marble surfaces)
- Hydrogen Peroxide (3 percent; if you want to spray it, you must use a dark spray bottle or screw the nozzle from another spray bottle directly onto the original peroxide bottle.)
- Thieves Oil
- Grapefruit seed extract
Update March 2020: These days my favorite way to clean is to use an e-cloth (see my review here) to clean up any actual messes, then I spray the surface with plain peroxide (so cheap!) Let it sit for 6-8 minutes, and it kills viruses! I get the ecloths as well as these lovely brown spray bottles for spraying the peroxide from Grove.co (sign up for a Grove.com account through this link and you'll get a free gift.

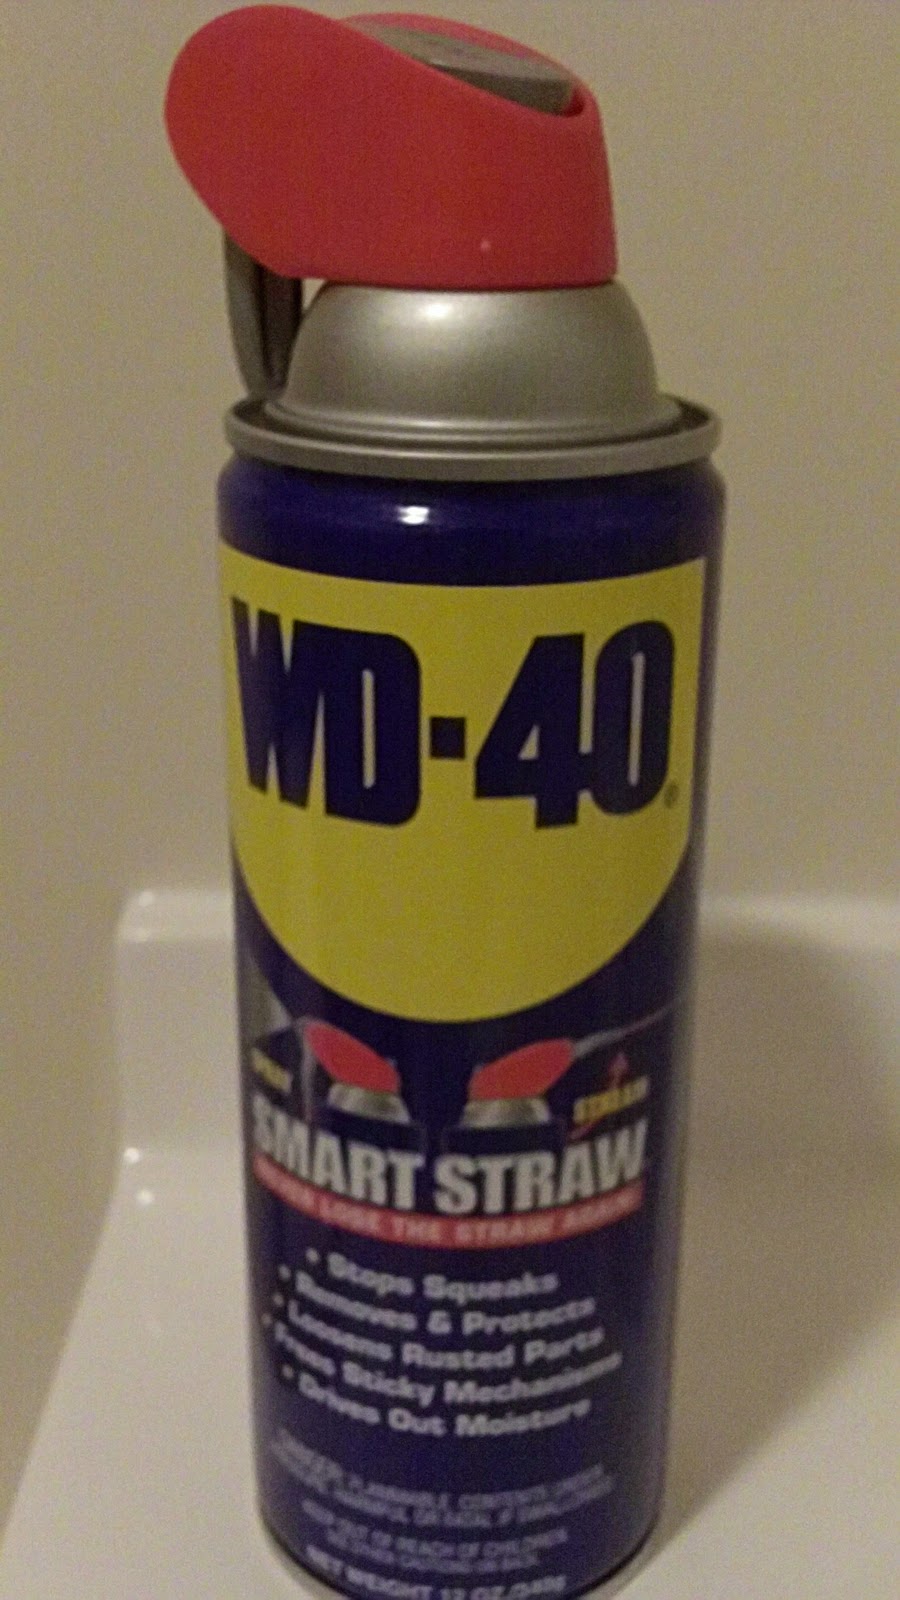
How to Remove Crayon from Clothing
Preschool Boy + Pockets + Crayons + Washer + Dryer =

Yes, that is one of my daughter's good dresses that is absolutely covered in yellow crayon. I washed and dried an entire load of kids clothes with a yellow crayon. Every article of clothing had lovely yellow splotches on it. Rather than cry, I did a little searching until I came up with what I thought should be the least pain-free way of removing said yellow crayon splotches.
In case you ever find yourself in the same predicament, here are step-by-step instructions for removing crayon from clothing.
- Spray each crayon splotch with WD-40.
2. After you have sprayed the spots, place the clothing into the bathtub with the hottest water you can get. (It is very important to have your water very hot or you will end up with grease spots on the clothes.)
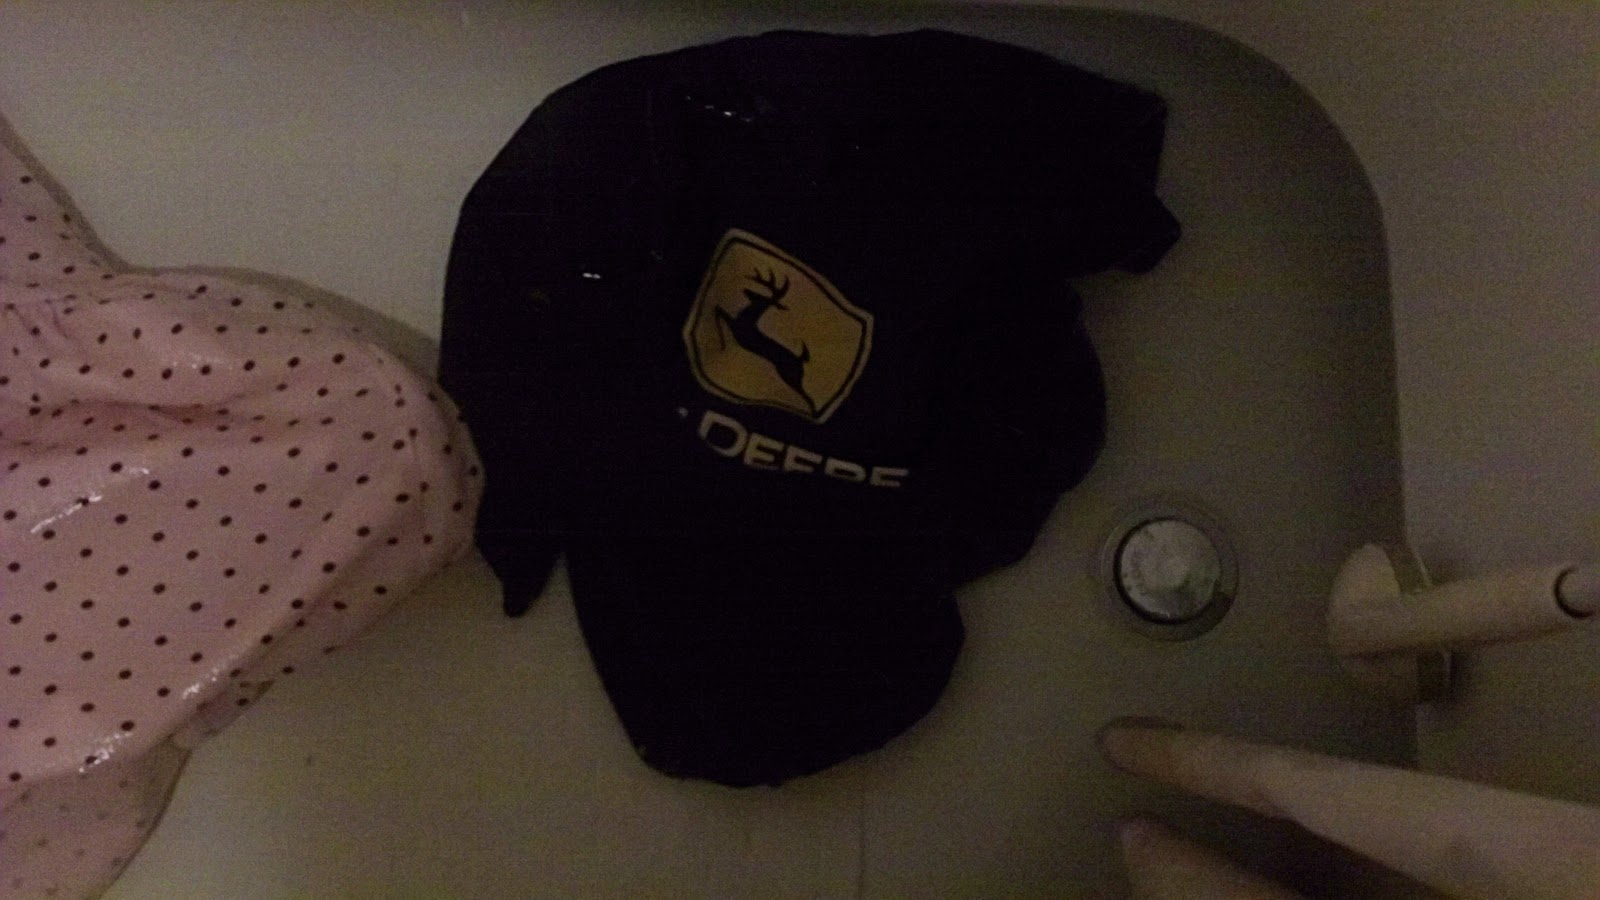
3. Let the clothing sit for a few minutes and scrape each spot with your fingernail. The crayon should come right off, along with some oil from the WD-40.
4. If you have tough spots, re-spray them and scrub them some more with your fingernail. When you have removed all or most of the spots, put the clothes into the washing machine on the hottest water setting. Use good laundry detergent like Tide if you can.
5. You may have to send the load through a couple times and use some good-smelling fabric softener to get rid of the oily smell from the WD-40.
6. Do not dry any of the clothes until you are sure the crayon marks are gone. If you have any clothing that still has crayon marks, start over at step 1 and repeat until the crayon marks are gone.
7. NEVER wash a little boy's clothes in the future without checking the pockets!