Quantcast
Blog - Page 103 of 128 - Imperfect Homemaker

DIY: Scripture Conversation Hearts!

Those of you that have read my blog in past years know that I am no fan of Valentines day. I know, ba humbug, right? It is just not my favorite holiday! But while I mutter things under my breath like “February is the Monday of months,” this time of year usually finds me doing Valentines Day-related projects, anyway. {go figure!}

I normally try to do a little project to include in the decor for our church’s Valentines banquet. (You can see past projects here) This year is no exception…I created some of my very own conversation hearts to fit the theme of the evening!

diy scripture conversation hearts
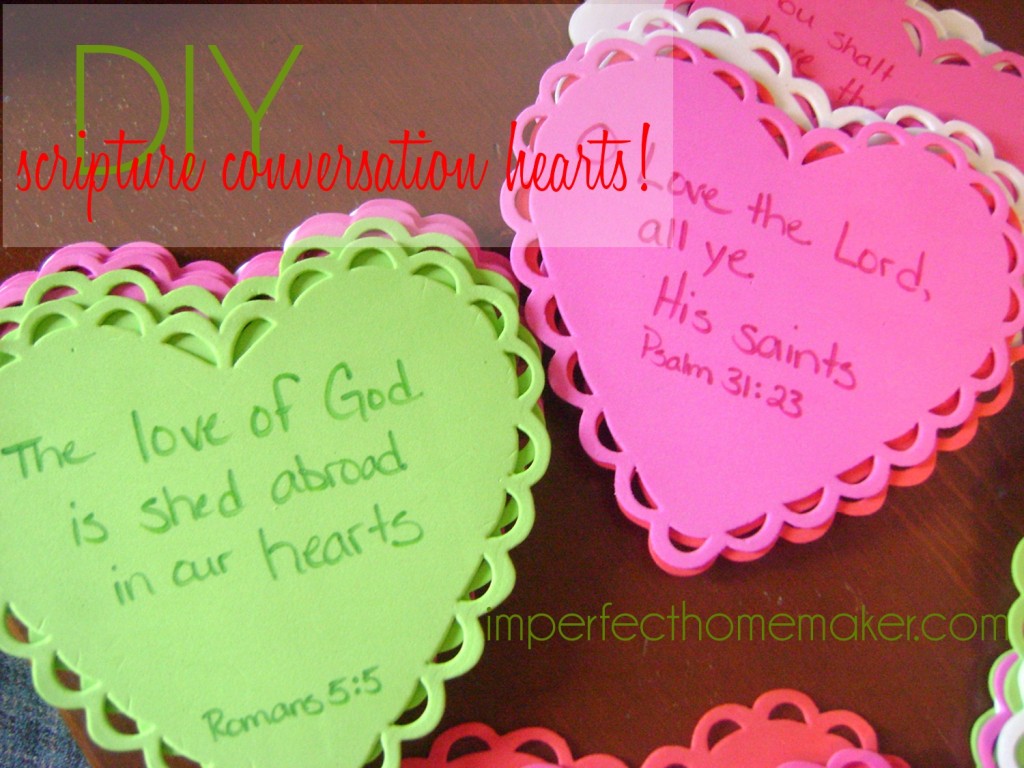
This was a super easy project, but I am excited about the color it will bring to the banquet tables, plus the truths of the scripture messages as a reminder of the Love of God!

I just picked up a package of scalloped foam hearts from our local dollar store.

foam hearts
I got the scalloped ones because they had the brightest colors, and I was looking to make these similar to the real thing.

scalloped edges
Then I got to work punching out the middles of the scallops. Random side note: if they went to the trouble to punch those, why couldn’t they have just poked them out at the same time???

poked out pieces
I found lots of verses that talked about the love of God for us, our love for God, and a few about our love for each other. I also tried to use verses that could be shortened easily, without losing the message of God’s love that I was trying to get across.

conversation hearts 1
Here are the verses I used:

Deuteronomy 6:5 …thou shalt love the Lord thy God with all thine heart…
Deuteronomy 11:1 Therefore thou shalt love the LORD thy God…
Joshua 22:5 ..take diligent heed… to love the Lord your God…
Psalm 18:1 I will love thee, O LORD, my strength.
Psalm 31:23 O love the Lord, all ye his saints….
Psalm 146:8 …the Lord loveth the righteous.
Jeremiah 31:3 …I have loved thee with an everlasting love…
Matthew 22:39 …love thy neighbor as thyself.
Mark 12:33 And to love him with all the heart…
John 3:16 God so loved the world…
John 15:9 …continue ye in my love.
Romans 5:5 …the love of God is shed abroad in our hearts…
I Corinthians 13:4 Charity…is kind…
I Corinthians 13:8 Charity never faileth…
II Corinthians 13:14 …the love of God…be with you all…
I Peter 1:22 …see that ye love one another…
I John 3:16 Hereby perceive we the love of God…
I John 4:7 Beloved, let us love one another…
I John 4:11 …God so loved us…
I John 4:16 …God is love…
I John 4:19 We love Him, because He first loved us.
Jude 21 Keep yourselves in the love of God…

conversation hearts 2

It was a bit time consuming, but not nearly as bad as it could have been if I had chosen to cut out paper hearts! (which is normally what I end up doing to myself, haha!) I just used a Sharpie to write the words, and it worked great. The foam was very easy to write on, and doesn't bleed through, so these could be used again on the other side!

conversation hearts 3

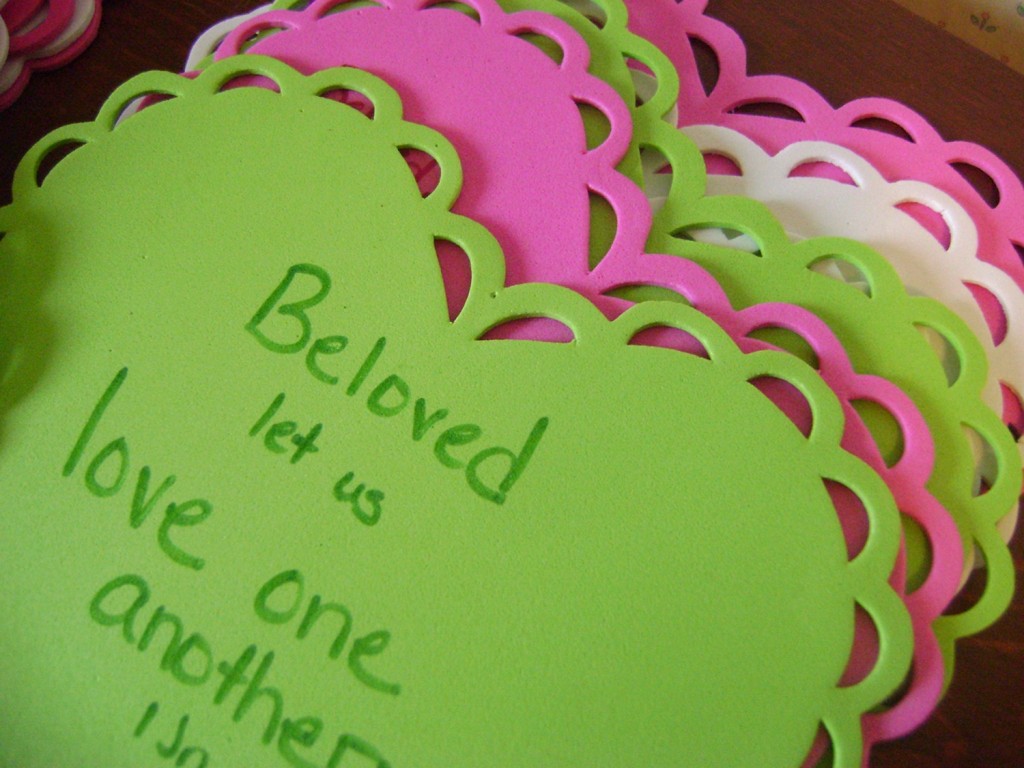
I don't have the prettiest handwriting, but I just did my best and tried to make each one look nice. I also used a tone-on-tone approach so the writing would be readable, but subtle enough to let the color of the heart stand out.

It was a fun project, that I think will make a big impact at our banquet! Anyone else doing any Valentines Day crafting lately?


My Valentine’s Day Wreath

DIY Valentines Wreath using items from around the house

I made this winter wreath back in January, but I made a quick update to turn it into something for Valentine's Day.


First I'll tell you how I made the winter wreath, then I'll tell you how I turned it into a Valentines wreath.

*The best part was that this wreath cost me nothing to make.  It was all junk I had stuffed stashed neatly up in the attic.


1. First I took a wreath form and traced it onto a piece of cardboard.  Then I cut it out and wrapped it in strips of white fabric.

valentines wreath


2. Then I started on my flowers.  I took tissue paper and cut it into lots and lots of  squares.  Then I stacked 4 squares together.

valentines wreath


3.  I folded the whole stack accordion-style.


valentines wreath


4.  Then I folded my “accordion” in half and stapled it in the middle.

valentines wreath


5.  Next, I snipped off the ends to form a point.  (I figured out later that this step is optional.  It makes your flowers look slightly different, but really it's just a matter of preference.  Try it with and without snipping and see which way you like it better.)

valentines wreath


6.  All I had left to do was fluff up the tissue paper to turn it into a flower!  I carefully peeled apart each layer of tissue paper and fluffed it until it looked like a flower.

valentines wreath


I kept making flowers until I thought I had enough to cover the wreath form, but unfortunately I do not have pictures of the rest of the process.

I got distracted by a minor emergency:

valentines wreath

Snot, peanut butter, and marker.  It was time for me to turn my focus to my kids who had done so well occupying themselves at the table.

The rest of the wreath should be pretty self-explanatory anyway.  I hot glued the flowers onto the cardboard wreath form until it was completely covered.  Then I took some pieces of lace, rolled them up and glued them on, and added another piece of lace to hang the wreath.

When February arrived, I printed up the word LOVE on red scrapbook paper, cut it out, and taped it to some twine.  I taped the twine onto the back of the wreath, and I was done!

DIY Valentines Wreath using items from around the house


I've never done any sort of Valentine's Day decor before, and I had fun cheering up my door with a free Valentines Wreath!


Did you do anything special to your house for Valentine's Day?


15 Minute Tasks for the Week

Organize and Clean


If you're just joining us this week, this program is set up so that you can jump in right where you are!


Last week we worked on disinfecting the remaining bedrooms.  I hope you didn't find any bed bugs!  This infographic from Moxie Pest Control tells you exactly how to look for them and how you can get rid of them.

This week we’re going to focus on organizing any of the bedrooms that you didn't work on a couple weeks ago.  I’ll be focusing specifically on the master bedroom, but do whatever works for you.

Be thinking ahead how to best organize your bedrooms so that you can be gathering the necessary supplies.  Andrea posted a very inexpensive way to make matching organizational bins, and Nicole shared some great tips for organizing small spaces.

Monday

Head into the room with a trash bag and three boxes.  Set the timer for 15 minutes and begin a purge of the room.  Work your way around the room clockwise and go through every closet, drawer, nook, and cranny.  Throw away any trash, add anything you do not need to one box to be donated or sold.  Add anything that belongs in another room to the other box to be put away.  In the third box, place items on which you are undecided.  You may think you can’t bear to part with something, but by the end of the week you may realize it’s time to let it go.  (Don’t focus too much on cleaning out the clothes unless you readily see something you know you need to get rid of.  We’ll be spending a couple days dedicated to just clothing later on.)


Tuesday

Continue with another 15 minutes of purging.  If you finished one bedroom on Monday, work in another bedroom.

Wednesday

Set the timer for 15 minutes and work on organizing one closet shelf or drawer.  Place like items together in bins or baskets.  Over-the-door shoe holders work well for holding small items such as small toys, scarves and accessories, or hey, even…shoes!  If you’re working in a child’s room, organize the room in such a way that is easy for children to keep organized themselves.  Label dresser drawers or toy bins (use pictures if they can’t read) so that children can put their items away in the correct places all by themselves.   If you're an adult, don't be embarrassed to label bins for yourself too.  We all forget sometimes what we decided belongs where.

Thursday

Work for another 15 minutes on organizing another area of the room.

Friday

You guessed it!  Another 15 minute organizing session in the bedroom!

Saturday

Take 15 minutes to wrap up loose ends in the bedroom.  If you have boxes of things that you haven’t decided what to do with, now is the time to make a decision.  Decide where the items belong and put them away, or put them in your donate box.


How did you do last week?  Did you get those bedrooms disinfected?  It makes you feel wonderful when you walk into the room, doesn’t it?

If you’re just joining us, you’ll probably want to subscribe to email updates or follow along on Facebook so you can keep up with each week’s new tasks.


Disclosure: This is a sponsored post.

Organized Homeschooling: How to Keep Those Records Straight! (Part 2)

organized homeschooling


The following is a guest post from my sister-in-law Lauren.


In the previous post, we looked at where to find all the papers you need to organize your home school.

Now, we must look at how to get all those mounds of papers organized into the filing cabinet in a functional and effective way! I also want to include in this organizational project, my own personal three ring binder that I keep out of the cabinet and on my “school shelf”.

I have moved all of my homeschooling posts to christianhomeschoolfamily.com.

You can go here to read this post at the new site.